When an L suits the room
An L works when two adjacent walls are free of doors for at least 2400 mm each and the door into the room is on one of the other two walls. It keeps everything within a few steps without the closed feeling of a U, and because the third and fourth walls stay open it is the layout that most easily takes a dining table or, in a bigger room, an island. It struggles when the door is in the corner, when a window sits low on one leg where the worktop would run, or when the room is long and narrow, where a galley does better.
A measured example
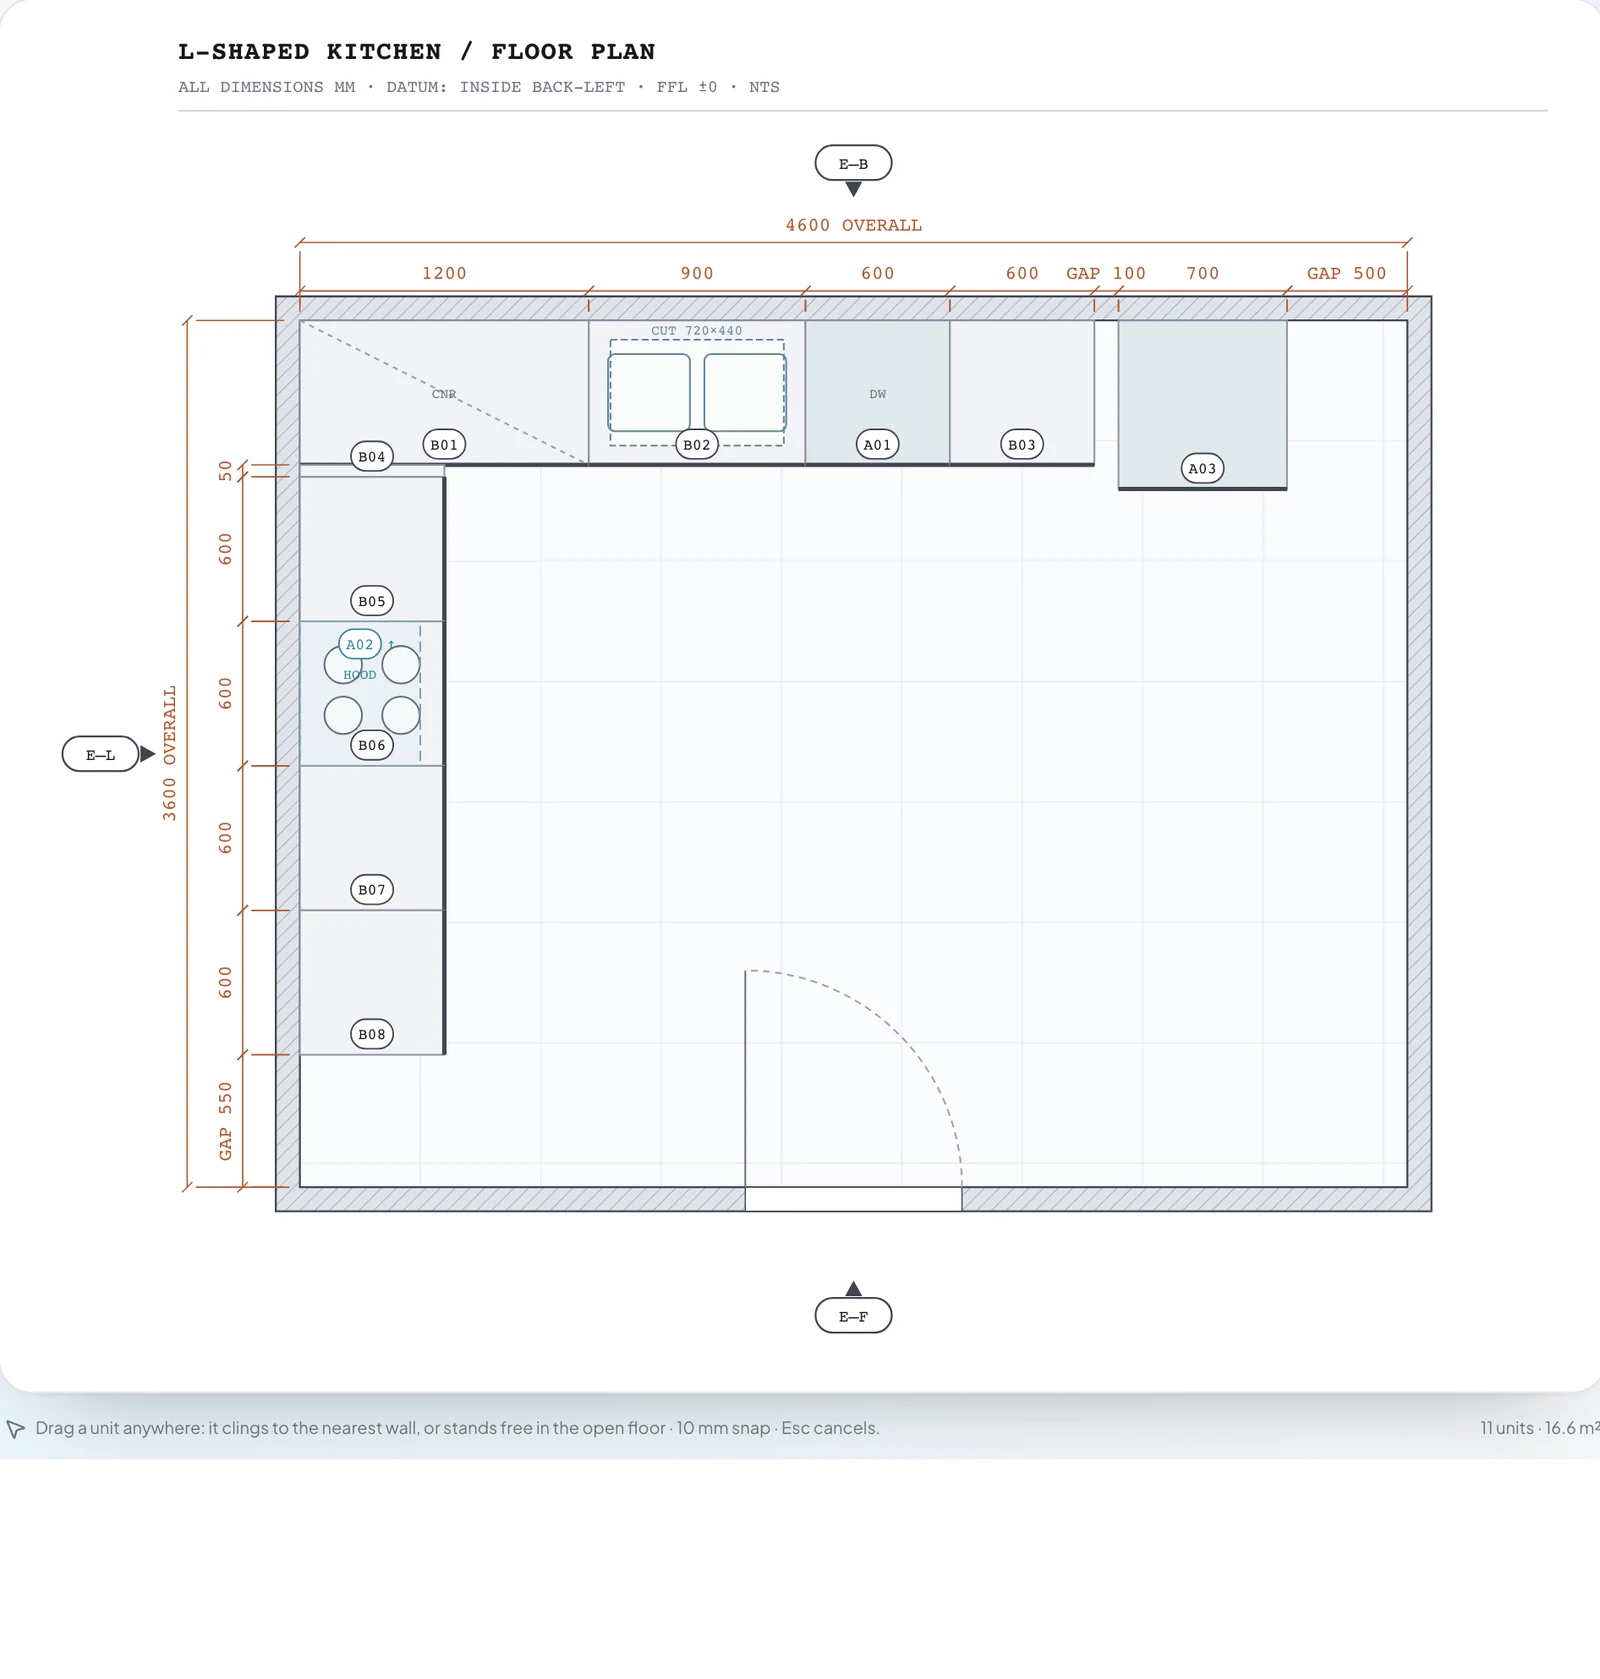
The plan below is the planner's L-shaped starter as it exports it: a 4600 × 3600 mm room with a 2800 mm ceiling, the sink run on the back wall, the cooking run on the left wall and a 900 mm door on the front wall. Every dimension on it is real.
| Code | Unit | Width | Wall | Position from corner |
|---|---|---|---|---|
| B01 | Blind corner base, door on the right | 1200 | Back | 0 |
| B02 | Sink cabinet, twin bowl | 900 | Back | 1200 |
| A01 | Dishwasher | 600 | Back | 2100 |
| B03 | Drawer unit | 600 | Back | 2700 |
| A03 | Refrigerator, 700 deep | 700 | Back | 3400 |
| B04 | Filler panel | 50 | Left | 600 (after the corner unit's return) |
| B05 | Drawer unit | 600 | Left | 650 |
| B06 | Hob cabinet | 600 | Left | 1250 |
| A02 | Chimney hood, 1550 above floor | 600 | Left | 1250 |
| B07 | Oven housing | 600 | Left | 1850 |
| B08 | Base cabinet | 600 | Left | 2450 |
| — | Door, 900 × 2100 | 900 | Front | 1850 |
All dimensions in millimetres. Position is measured along the wall from the corner at offset 0: the left corner for the back wall, the back corner for the left wall.
The two elevations
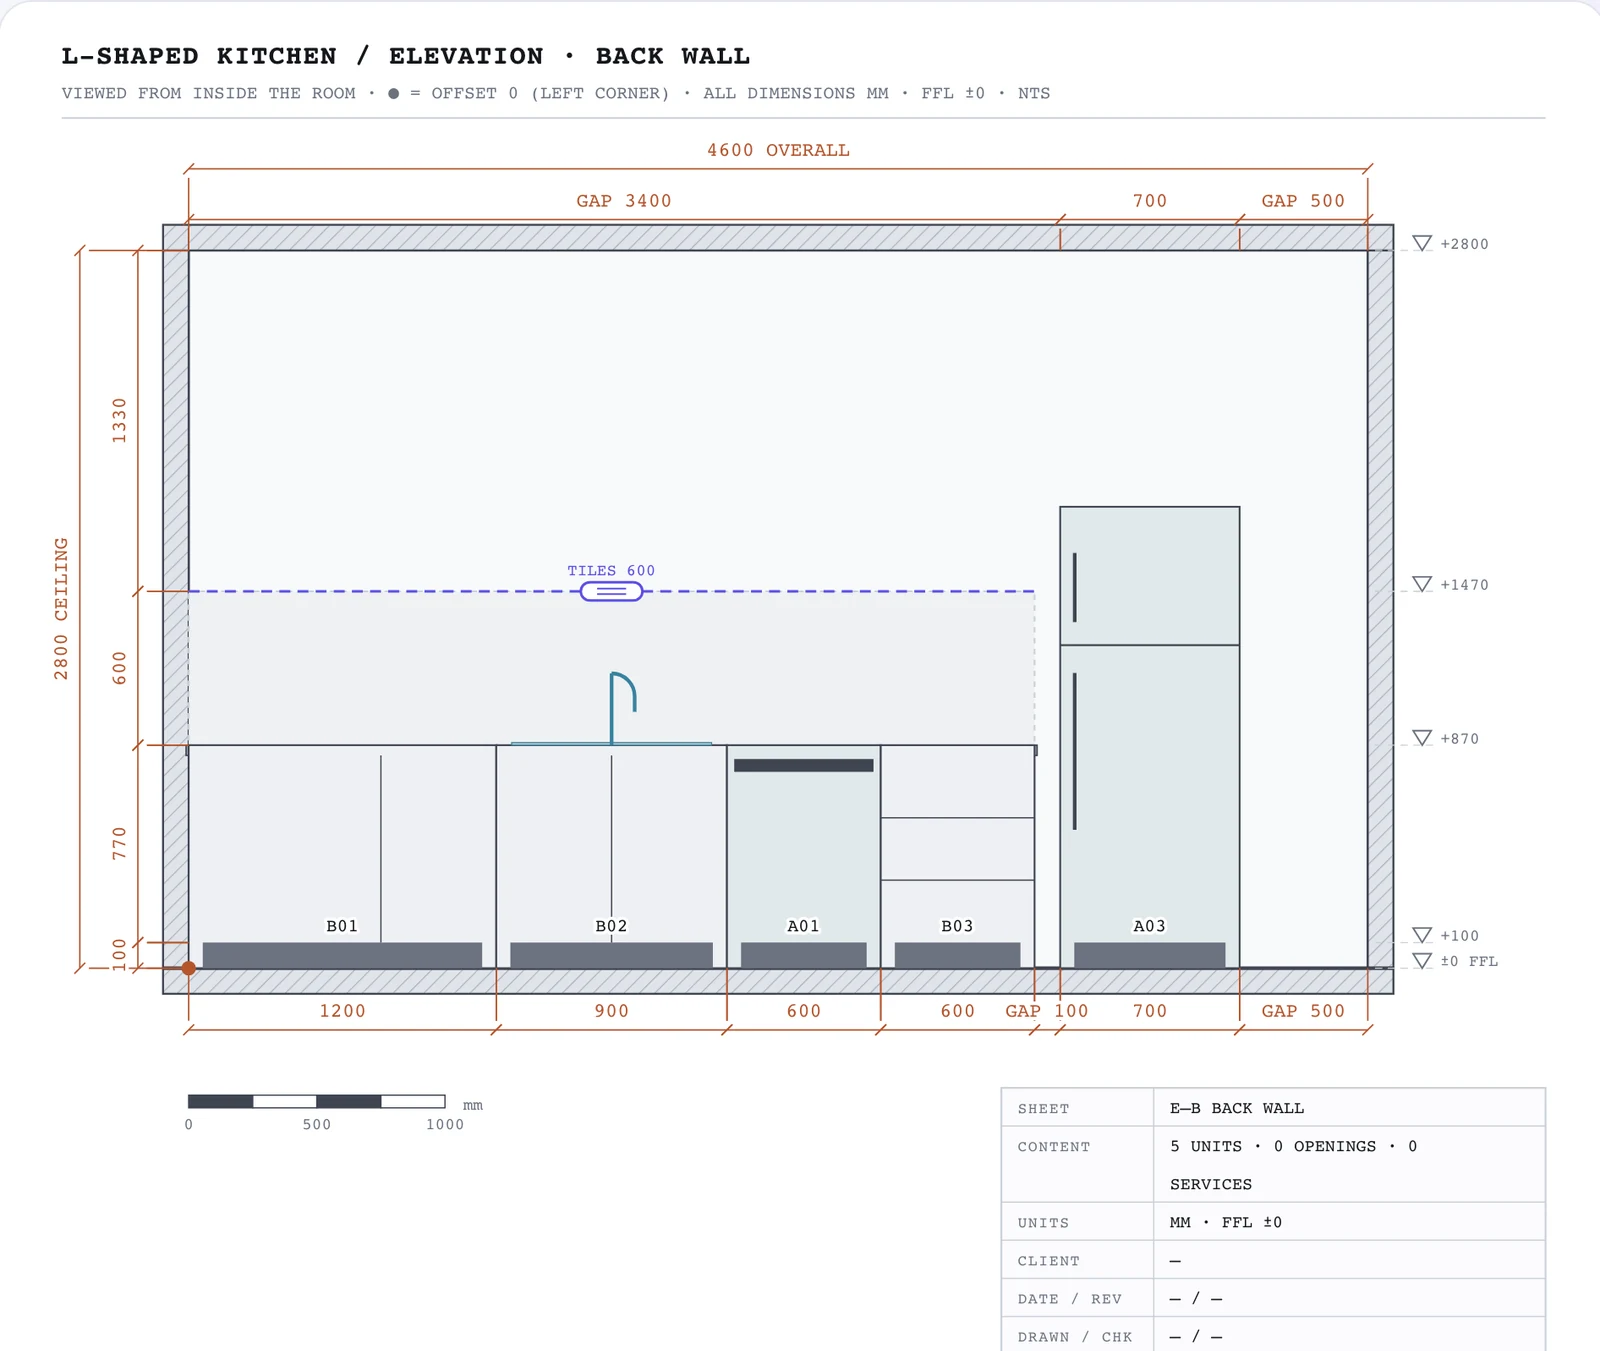
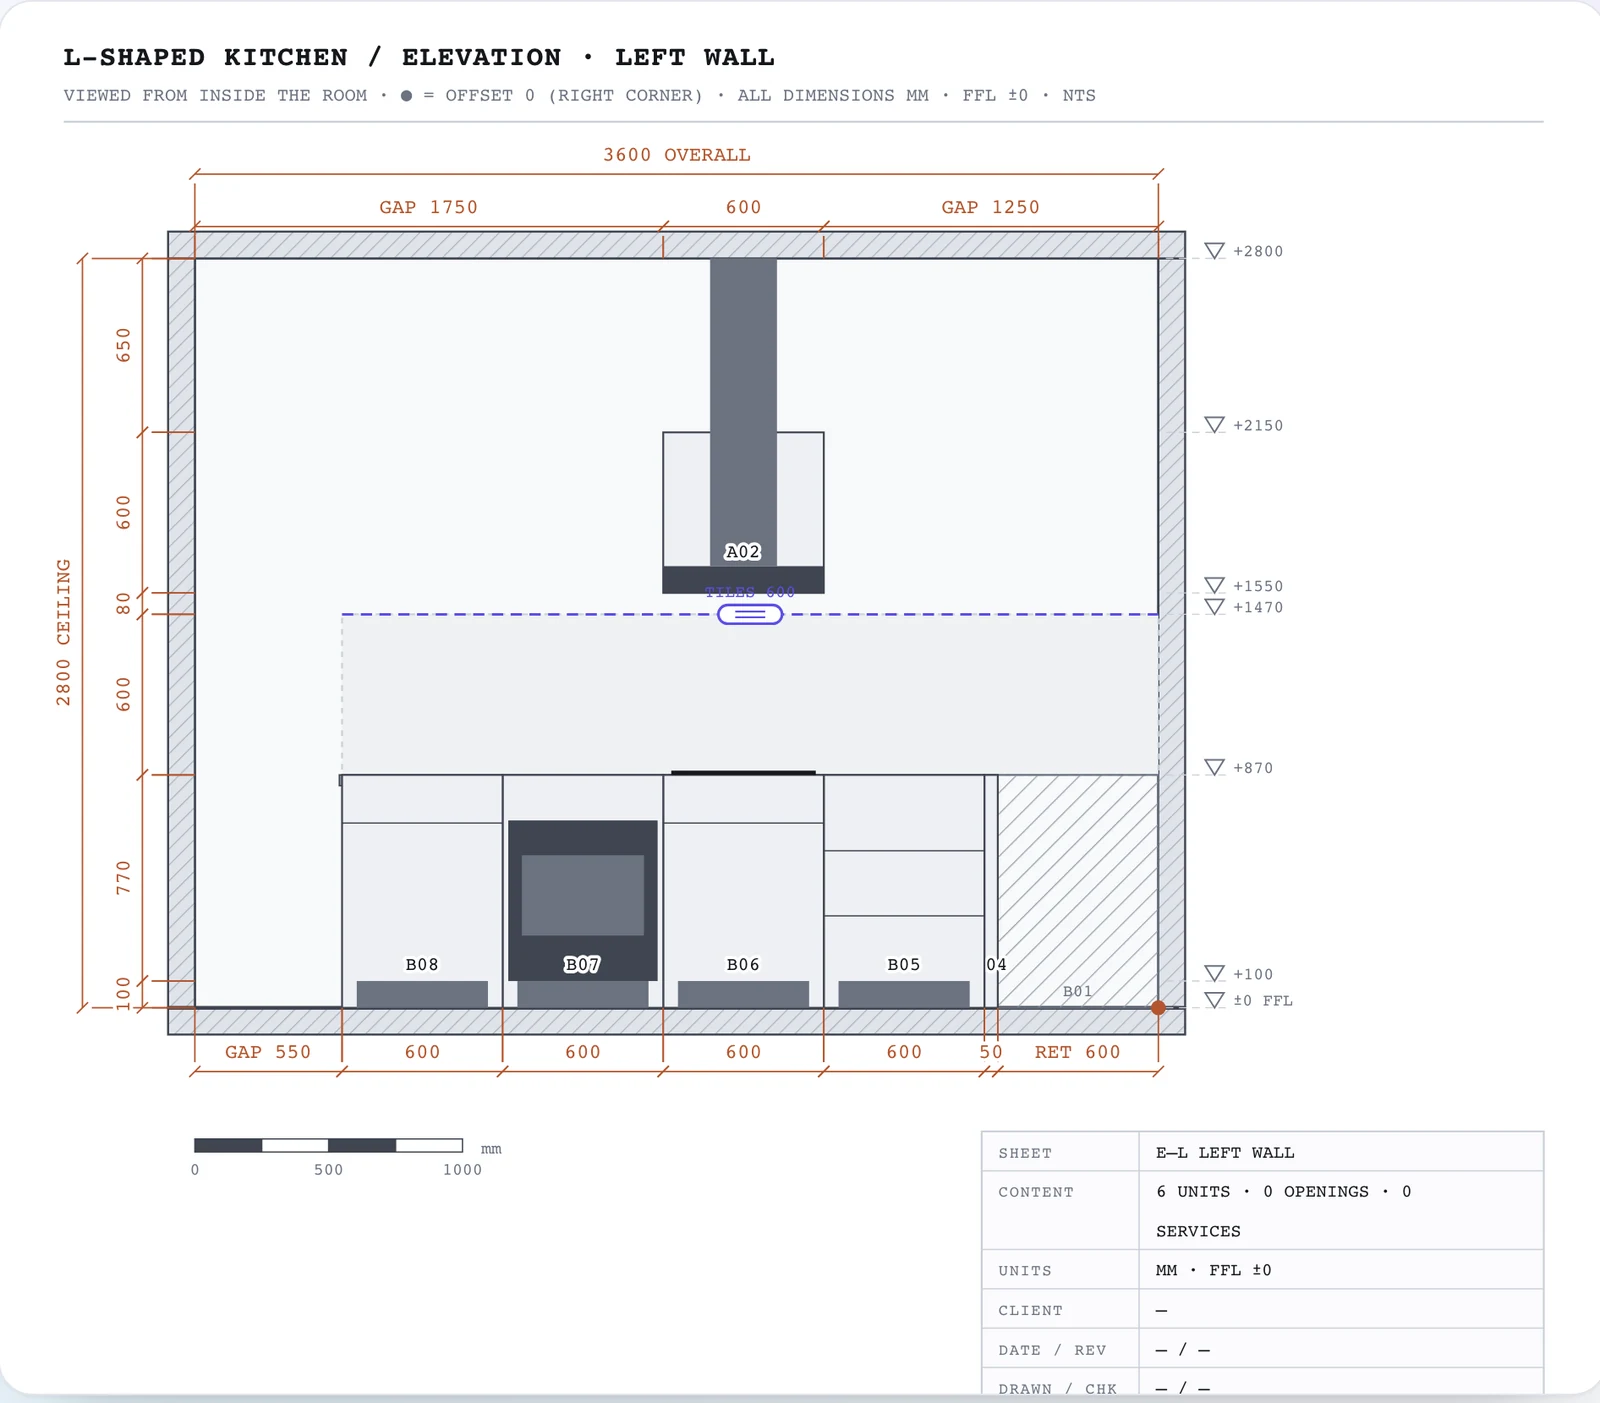
The elevations are what the fitter and the electrician actually read: heights. The back wall shows the worktop at 870 mm plus its 40 mm slab, the 600 mm tiled band above it, and the fridge standing past the worktop. The left wall shows the hood at 1550 mm, and the back wall's corner unit hatched where it returns 600 mm into this wall.
The corner
The corner is where an L is won or lost. The starter uses a 1200 mm blind corner base: its first 750 mm is blank and sits behind the left wall's return, and its 450 mm door opens on the back wall. The left run then starts 600 mm out from the corner, behind a 50 mm filler that gives the first drawer front room to clear the corner unit's door handle. Whatever mechanism you put inside the corner, keep the sink, hob and dishwasher out of it: two doors that meet in a corner cannot both open.
The work triangle in this layout
| Leg | From | To | Length |
|---|---|---|---|
| Sink to hob | 1650 along the back wall, 300 in | 300 in from the left wall, 1550 along it | ≈ 1840 mm |
| Hob to fridge | Left wall, 1550 along | Back wall, 3750 along | ≈ 3650 mm |
| Fridge to sink | Back wall, 3750 along | Back wall, 1650 along | ≈ 2100 mm |
| Total | ≈ 7.6 m, inside the 4–7.9 m guideline |
Landing space works too: 600 mm of drawers either side of the hob, the dishwasher beside the sink sharing its waste, and a drawer unit beside the fridge to set the shopping down on.
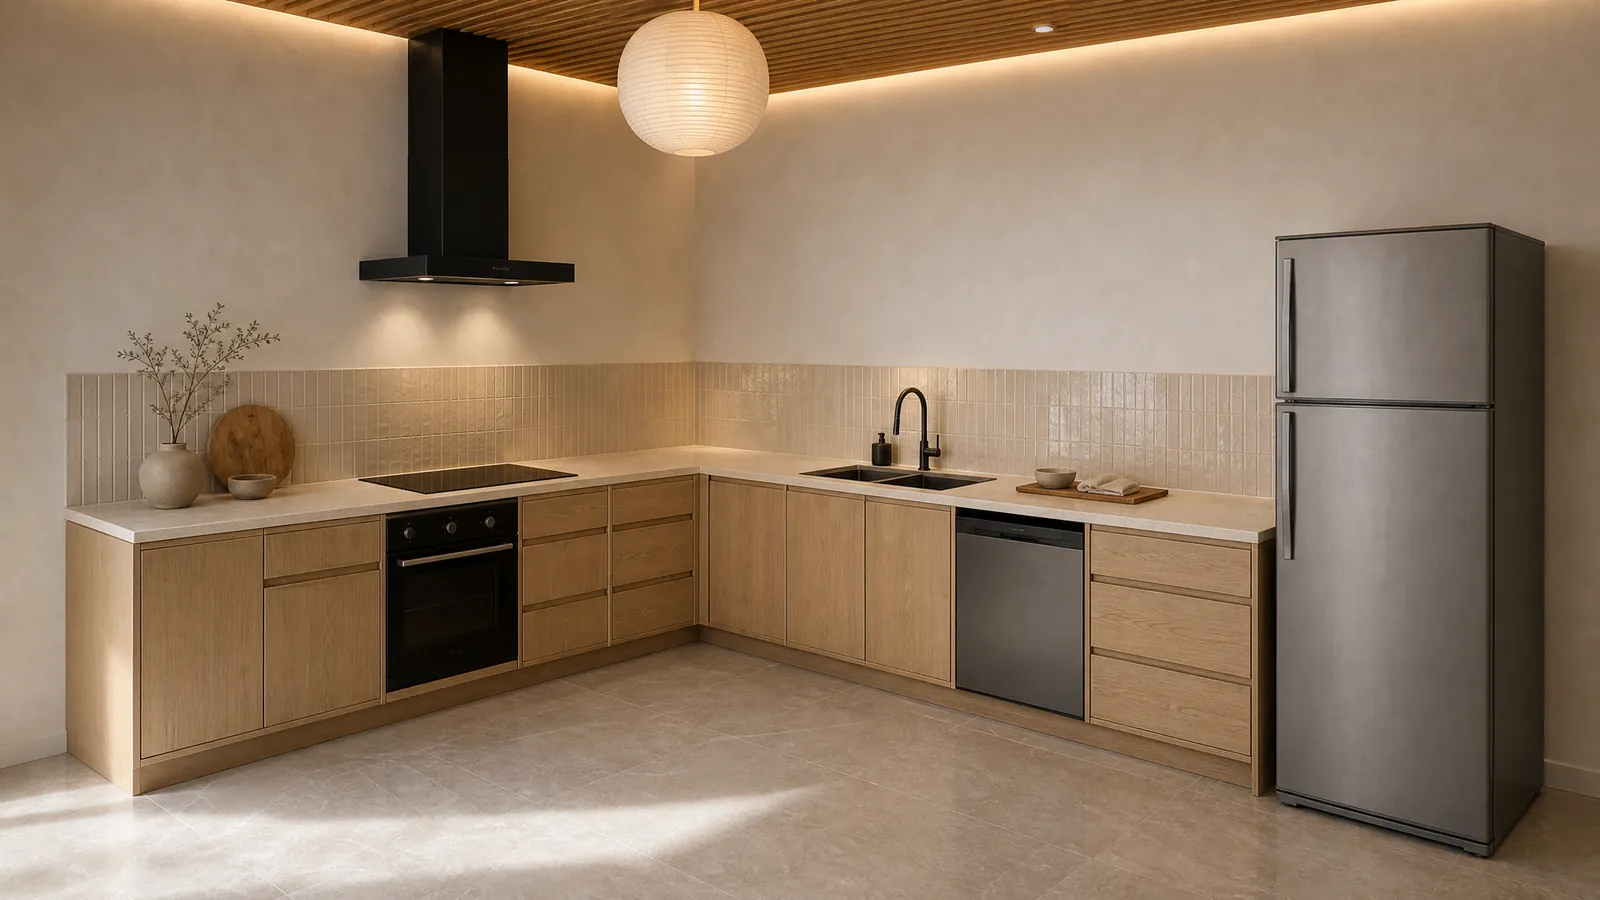
The same layout rendered
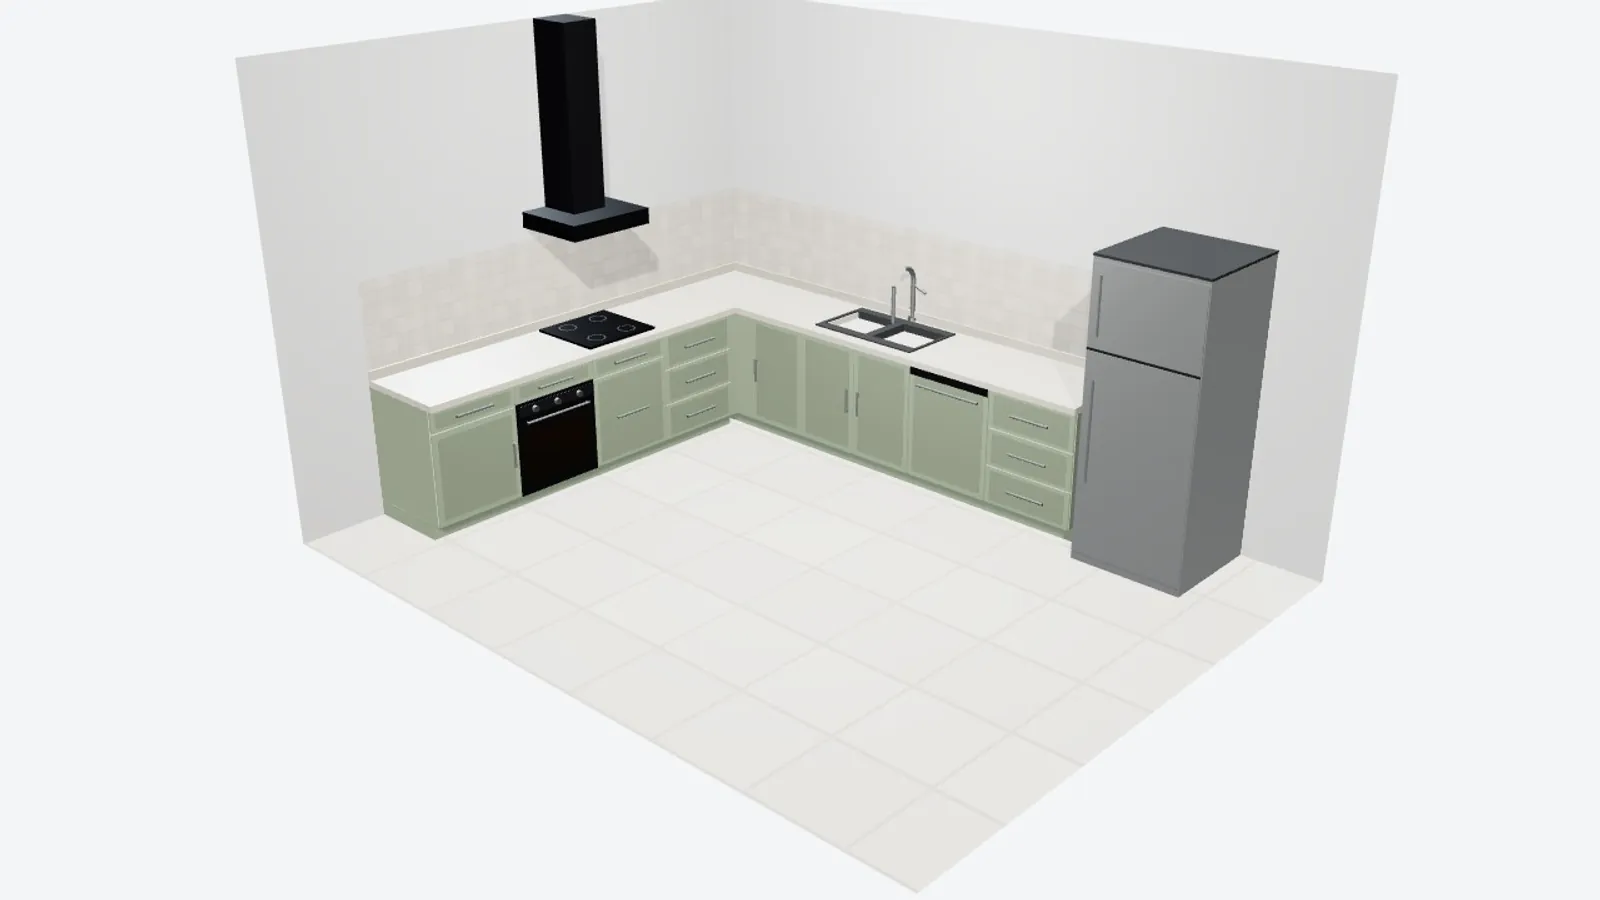
The 3D view and a realistic image of it, both from this plan. The render was generated by the planner on 18 September 2026 in the Japandi theme and has not been edited; it is an AI visualisation of the model, so treat the plan above as the record.
Adapting it to your room
- Shorter legs. Delete the last cabinet on the leg that is shrinking, or swap the 900 mm sink for an 800. Keep the 600 mm of landing either side of the hob before anything else.
- Longer legs. Use Fill this wall to run base cabinets into the gap, then put a tall larder at the far end so the run has a full stop.
- The door on a different wall. Move it in the Room tab; the planner keeps its swing clear and flags any unit that lands in it.
- A window over the sink. Add it to the back wall above the sink at a 1100 mm sill; the hob-under-window check only applies if you move the hob there.
Questions
How this page was made
Every drawing and image on this page is an unedited export from the planner's L-shaped starter layout on 18 September 2026; the schedule and the triangle lengths are read from the same saved project. Guideline figures are from the NKBA Kitchen Planning Guidelines. The layout is an example to adapt, not a design for your room.
Sources
- NKBA Kitchen Planning Guidelines · work triangle and landing figures
- Kitchen layout dimensions and clearances · the numbers this layout is checked against
Written by the person who builds the planner, who is not a kitchen designer or an electrician: the guides say where a professional or a local code decides. Found a mistake? Write to us and it will be corrected with a note on this page.
Keep reading
- Galley kitchen layout with dimensionsTwo facing runs and the aisle between them: minimum widths, what goes on which side, and a measured example.
- Small kitchen layouts with dimensionsWhich layout fits a small room, the unit sizes that buy back space, and two worked examples under 3 m wide.
- How to measure a kitchen for planningWhat to measure, in what order, with a printable worksheet, so a plan is drawn on the room you actually have.
Try it on your room
Enter your measurements, start from a layout and let the layout checks find what will not fit. Planning is free for 1 month, and the dimensioned plan is yours to download.
Start designing free