What an elevation is for
Nearly everything that goes wrong between a kitchen plan and a fitted kitchen is a height. The socket that ended up behind the dishwasher, the hood that would not clear the window, the tiles that stopped 50 mm short of the wall cabinets, the wall cabinet hung so low nobody could chop under it. None of those appear on a floor plan, because a floor plan is a view from above. An elevation is the view from inside the room, one wall at a time, and heights are its whole point.
What Setout Kitchen draws
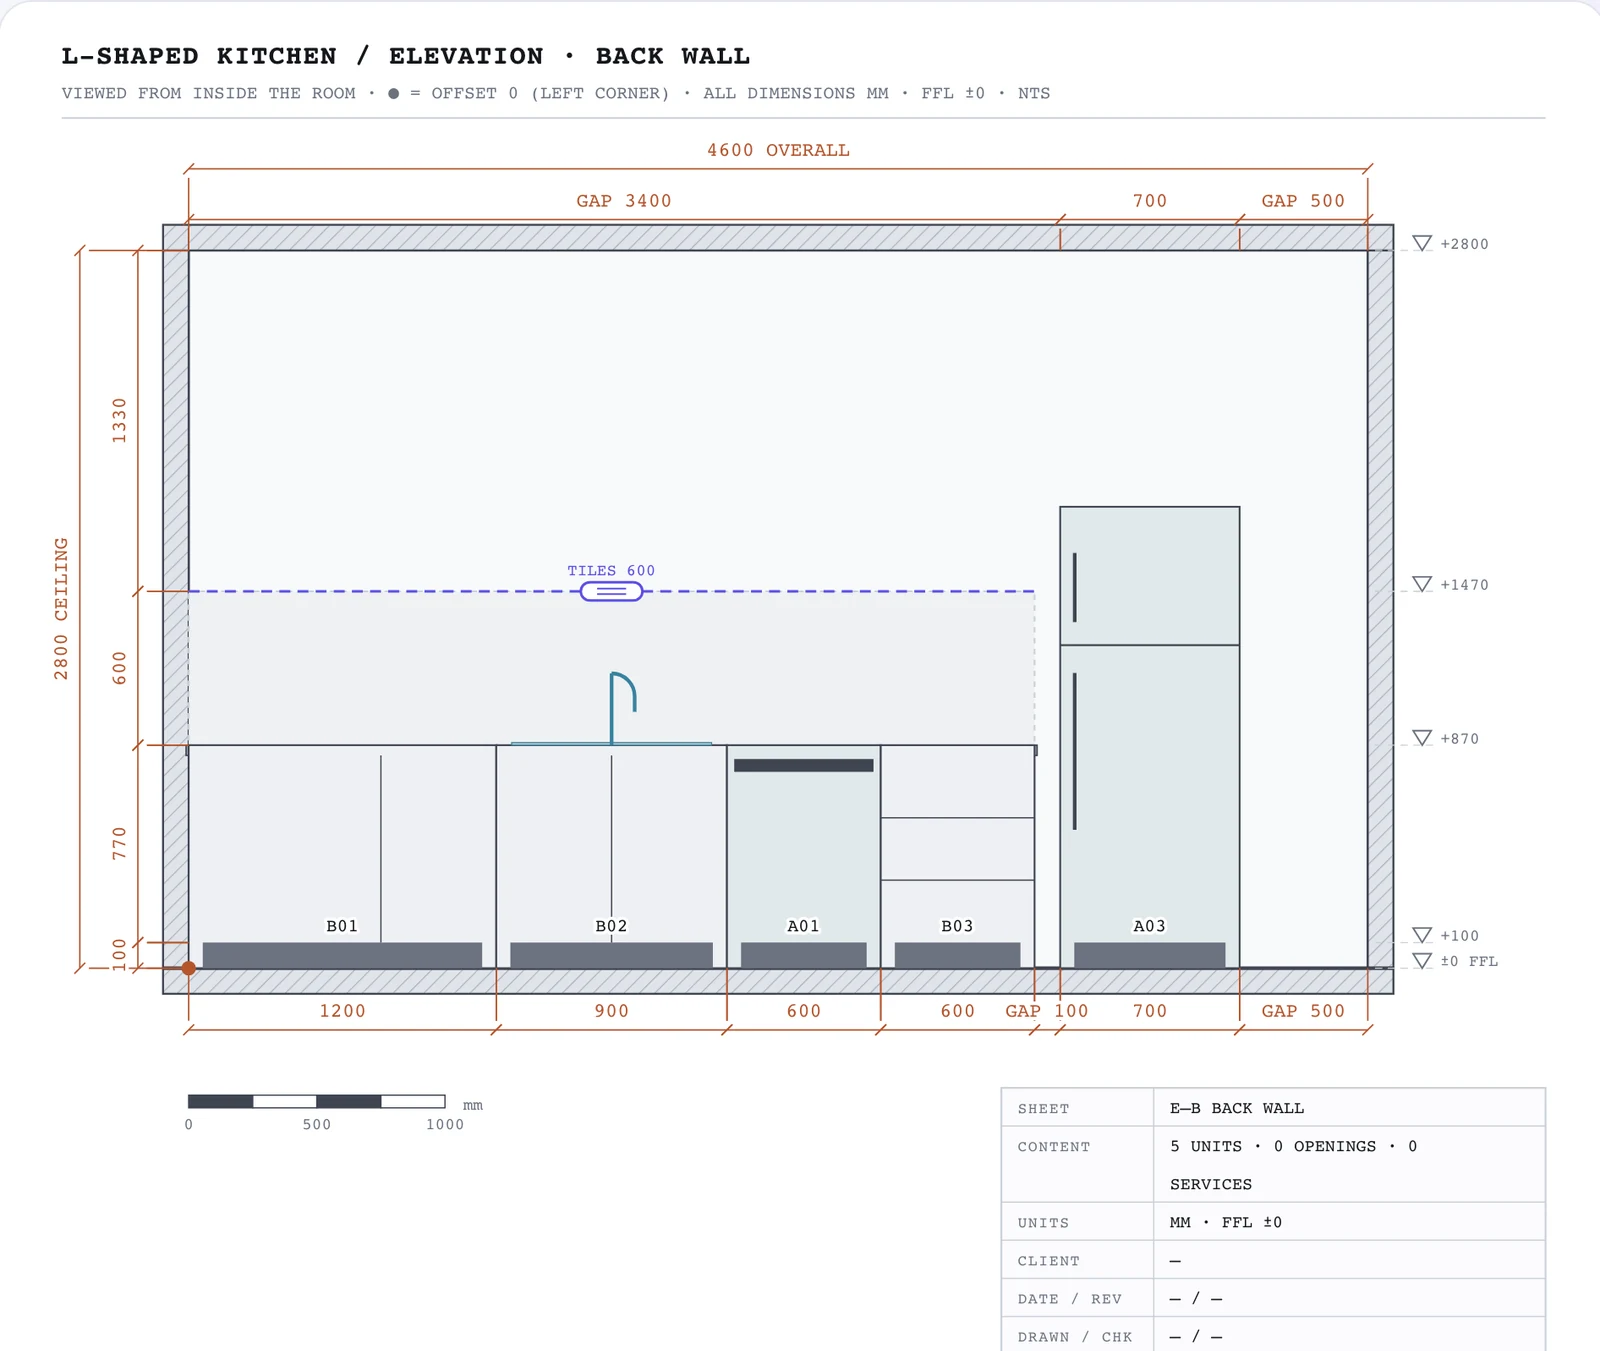
One sheet per wall, and one for each free-standing island, with the wall's units in order and dimensioned along the top and bottom, the worktop and its 40 mm slab, the tiled band with a drag handle at its top edge, wall cabinets and the hood at their mounting heights, tall units and the fridge standing past the worktop, and every socket, switch, water and drain point you have placed, each with its height above the finished floor. Units on the neighbouring wall that meet this one are hatched, so a return is never read as a gap.
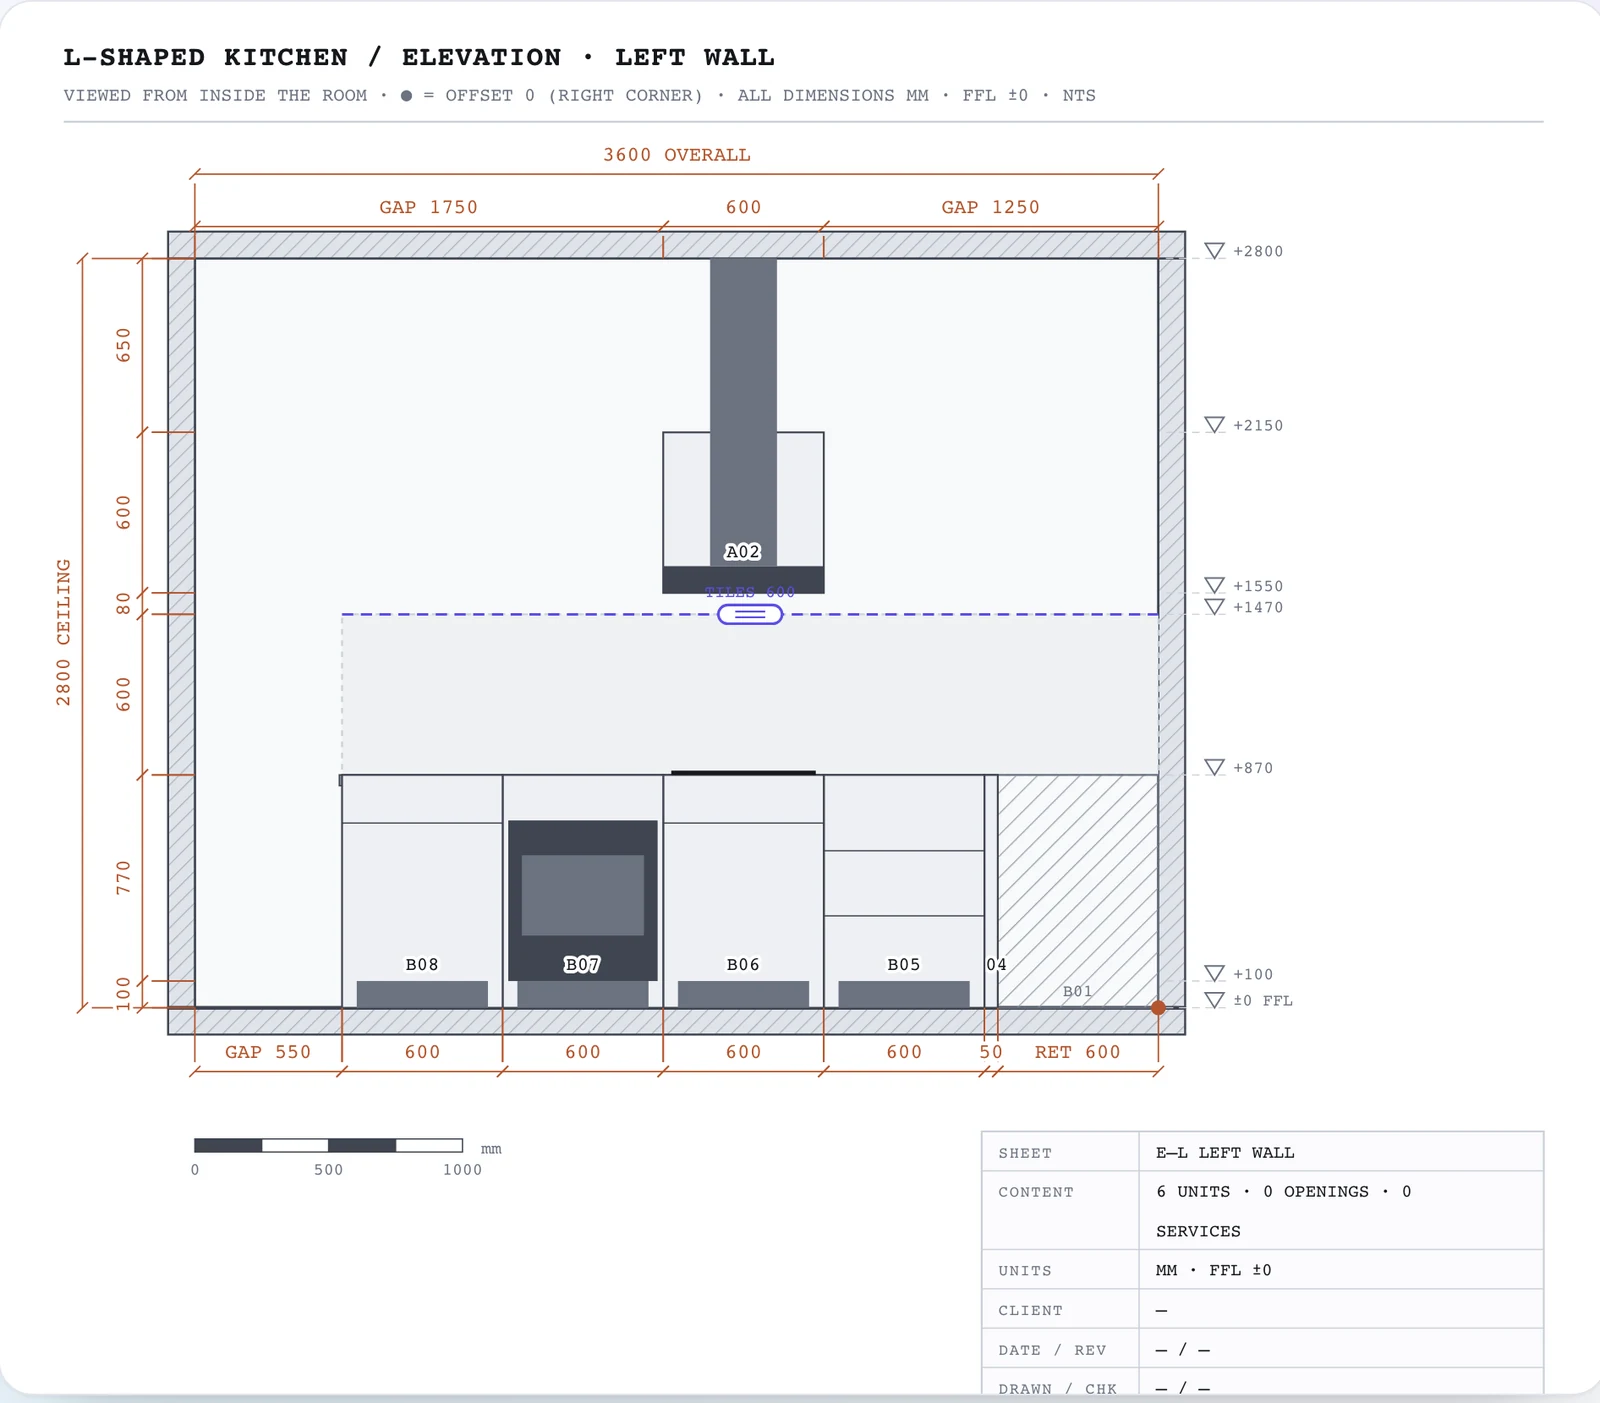
Each sheet carries the same furniture an architect's drawing does: a title and convention note, a graphic scale bar, and a title block with the sheet code, what is on it, the units, and your client, date, revision and status fields, so two prints from different weeks can be told apart.
How to read one
| Mark | Meaning |
|---|---|
| Viewed from inside the room | You are standing in the kitchen looking at that wall, so left on the drawing is left in the room |
| ● = offset 0 | The corner the wall's positions are measured from; the plan uses the same corner |
| ▽ +870 | A level marker: this line is 870 mm above the finished floor |
| Dimension chain | The widths of the units along the wall in order, with GAP where the wall is bare and RET where a neighbouring wall's unit returns |
| Hatched unit | A unit on the adjacent wall that meets this one, seen end-on |
| Dashed line with a handle | The top of the tiled splashback, which you can drag |
| B03, A02 | Unit codes: B for base, A for appliance, matching the plan and schedule |
| NTS | Not to scale on paper: read the numbers, use the bar for proportion |
Editing in the elevation
The elevation is not only an output. Select a unit on it and drag it sideways to move it along the wall; drag the purple edge handles to resize it; use the arrow keys to move it 10 mm at a time, or up and down to change a wall unit's mounting height. Drag the tile line to set how high the splashback runs on that wall, or switch it off for a wall that stays painted. Every change shows in the plan and the 3D view at once.
Exporting
Export PDF prints every sheet in the pack, plan and elevations together with the unit schedule, in millimetres, centimetres, metres, inches or feet and inches. Each elevation can also be downloaded on its own as SVG, which opens in any vector editor and can be marked up by hand. Both are free on every plan, with no paid tier for drawings, and stay downloadable after editing ends. See the plan page for what the rest of the pack contains.
Questions
How this page was made
Both drawings on this page are unedited exports of the planner's L-shaped starter layout on 18 September 2026. The conventions table describes the drawings as they are generated; if the drawings change, this page is updated with them.
Sources
- Plan & Setout Sheet · the floor plan these elevations belong to
- Kitchen layout dimensions and clearances · the heights an elevation is checked against
Written by the person who builds the planner, who is not a kitchen designer or an electrician: the guides say where a professional or a local code decides. Found a mistake? Write to us and it will be corrected with a note on this page.
Keep reading
- Realistic kitchen rendering from your 3D planHow a 3D view becomes a realistic image, what it keeps, what it can change, and real examples side by side.
- How to measure a kitchen for planningWhat to measure, in what order, with a printable worksheet, so a plan is drawn on the room you actually have.
- Kitchen layout dimensions and clearancesCounter heights, cabinet depths, aisle widths, landing space and the work triangle, with the numbers the planner checks against.
Try it on your room
Enter your measurements, start from a layout and let the layout checks find what will not fit. Planning is free for 1 month, and the dimensioned plan is yours to download.
Start designing free